When I am between assignments, I bring out some older work and play. I sit and look at an image until something comes to me to make it better, different or more creative.
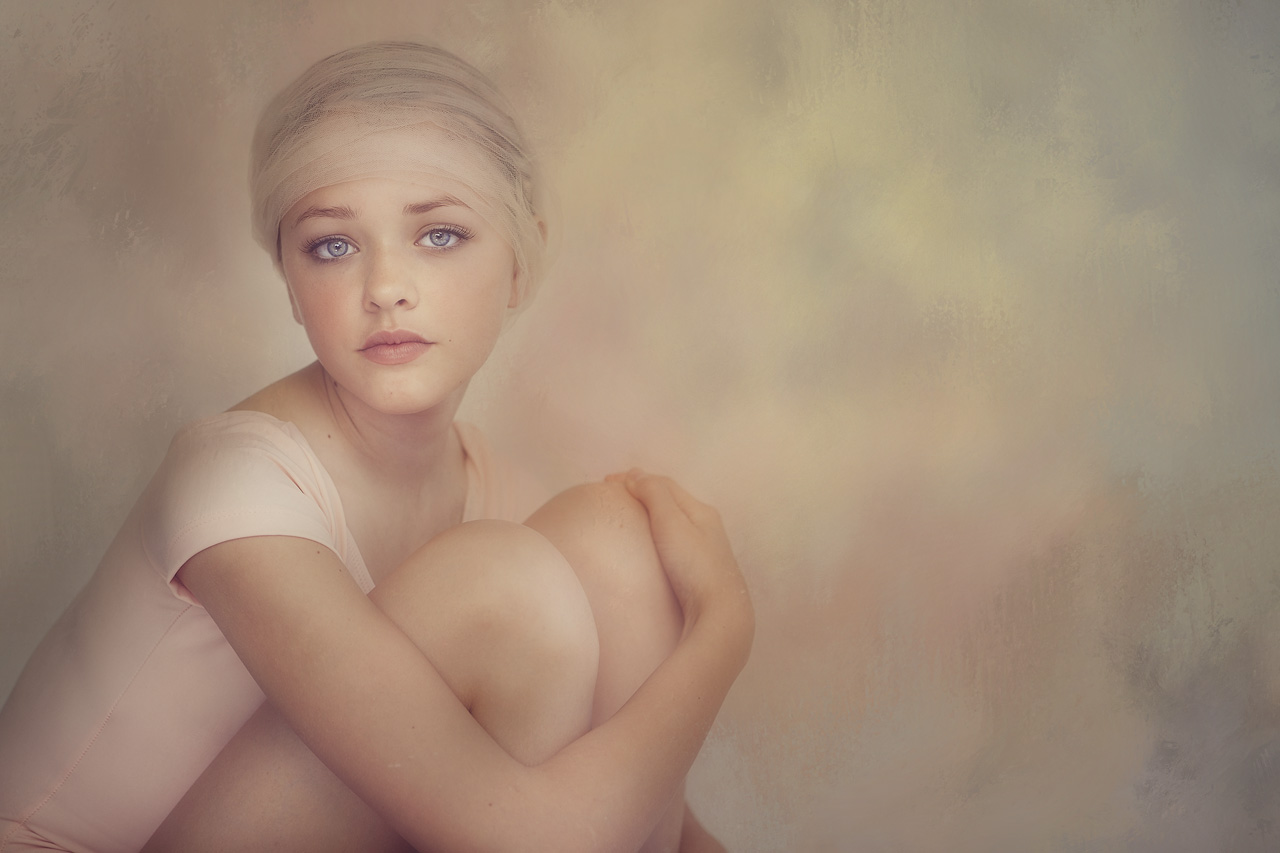
While I have been doing a small amount of texture experimenting in small doses, I realized I could add a lot and make portraits more painterly. This is a look that I am really starting to love. While I love all of my portraits and think they are worthy of a frame and sit prominently in someone’s home, textures and the color of those textures can add so much to a homes decor.
Below are some screenshots of adding texture and making a beautiful portrait even more beautiful.
First you start with your image and your texture…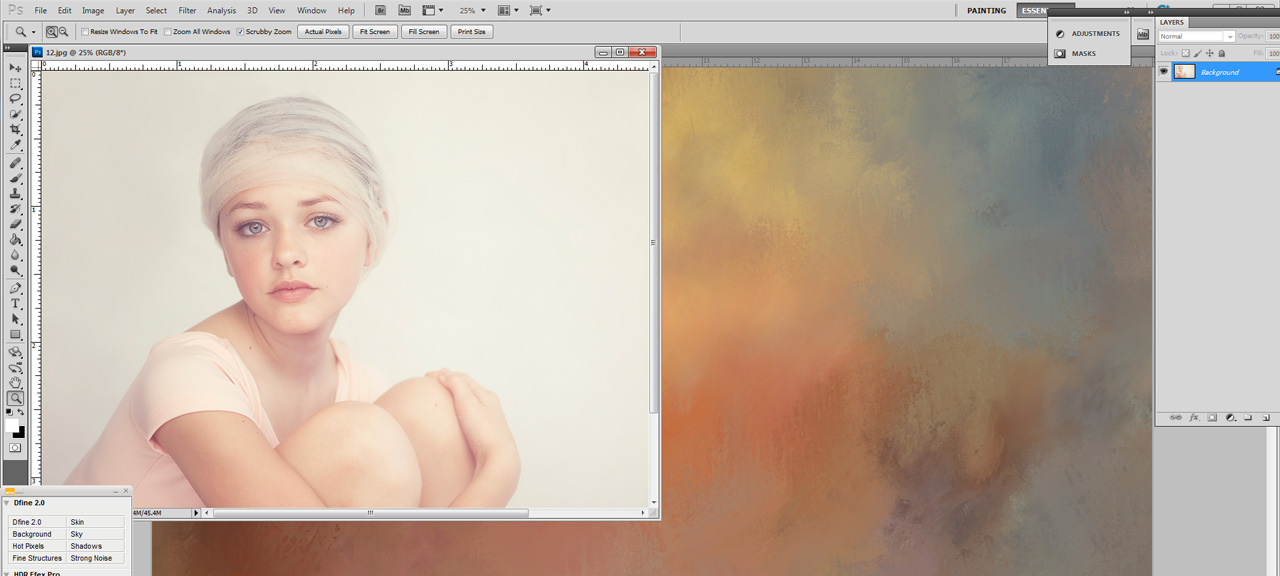
Then with your move tool, drag the texture on top on your portrait…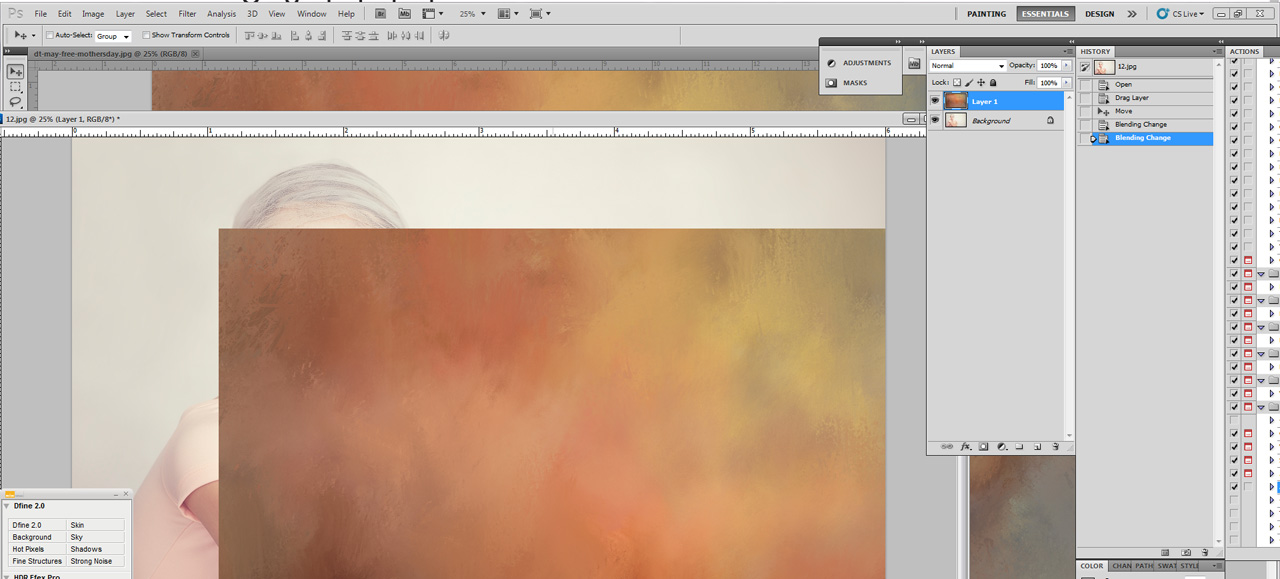
Once the texture is in place, you can change the lighting and opacity of that texture layer. I tend to use multiply a lot, but play around and see what suits you best…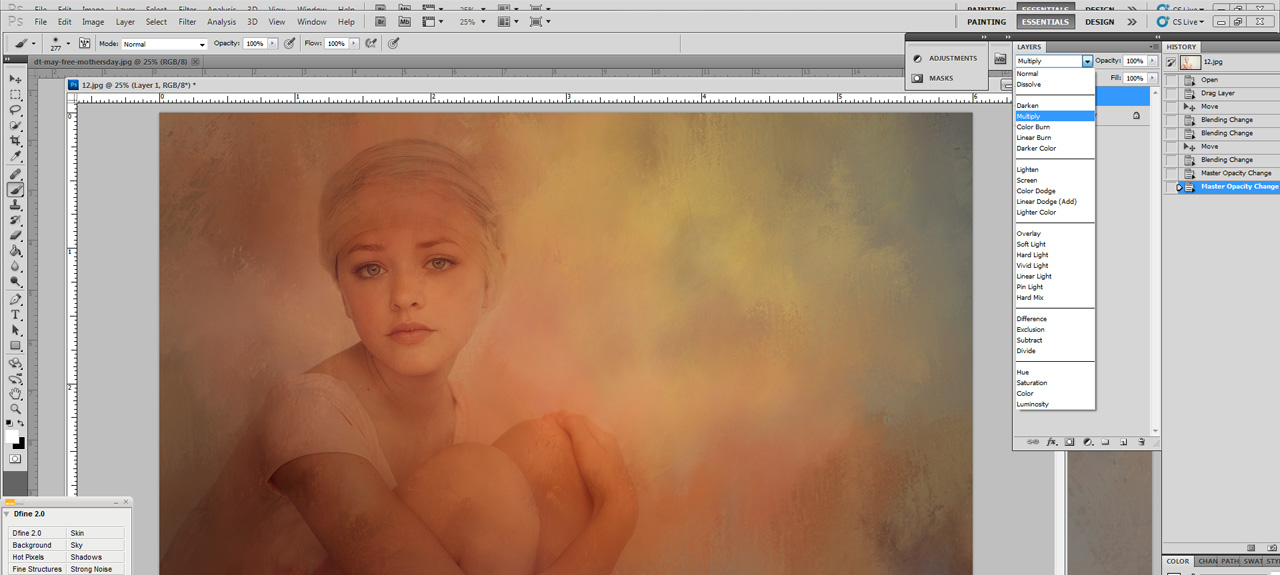
Once you have your lighting and opacity where you want (you can always tweak later), add a mask so you can erase portions of the texture you do not want. Remember to set your opacity and flow from the top menu bar…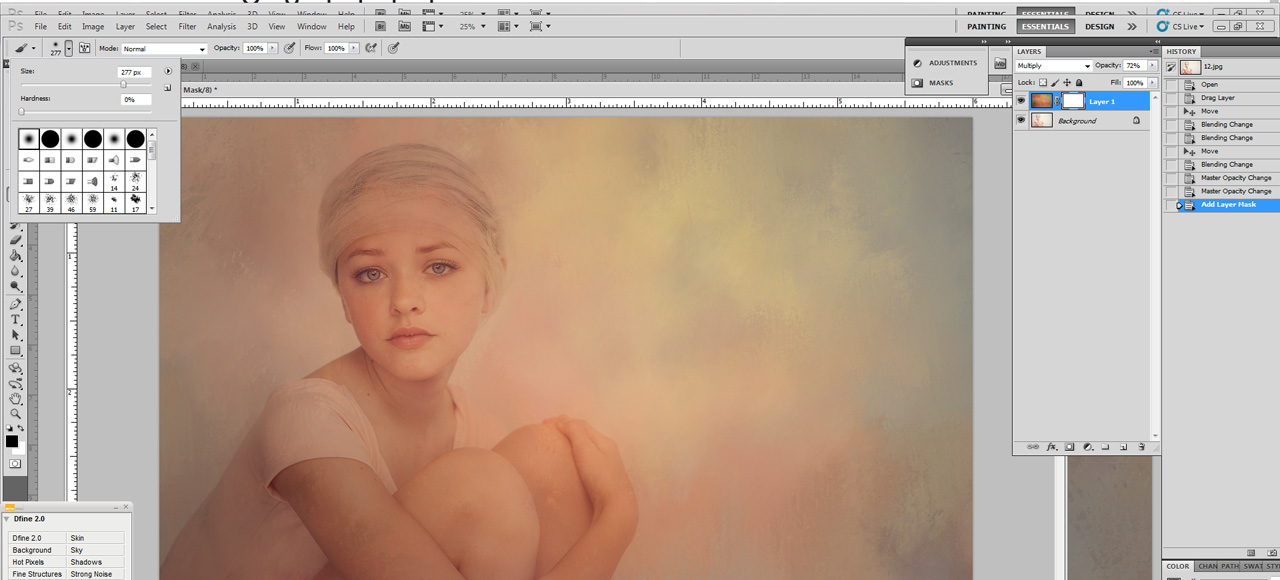
Here is an example of having 100% opacity and 100% flow. You may like this and it can work for various portraits. However; with this portrait, I will dial it down a bit…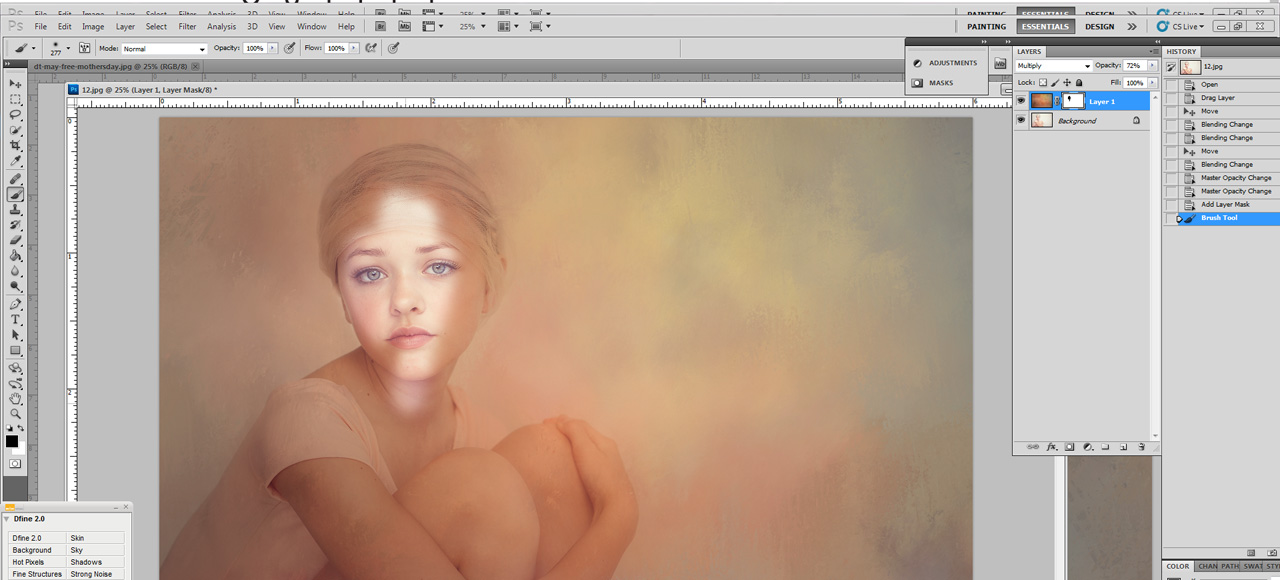
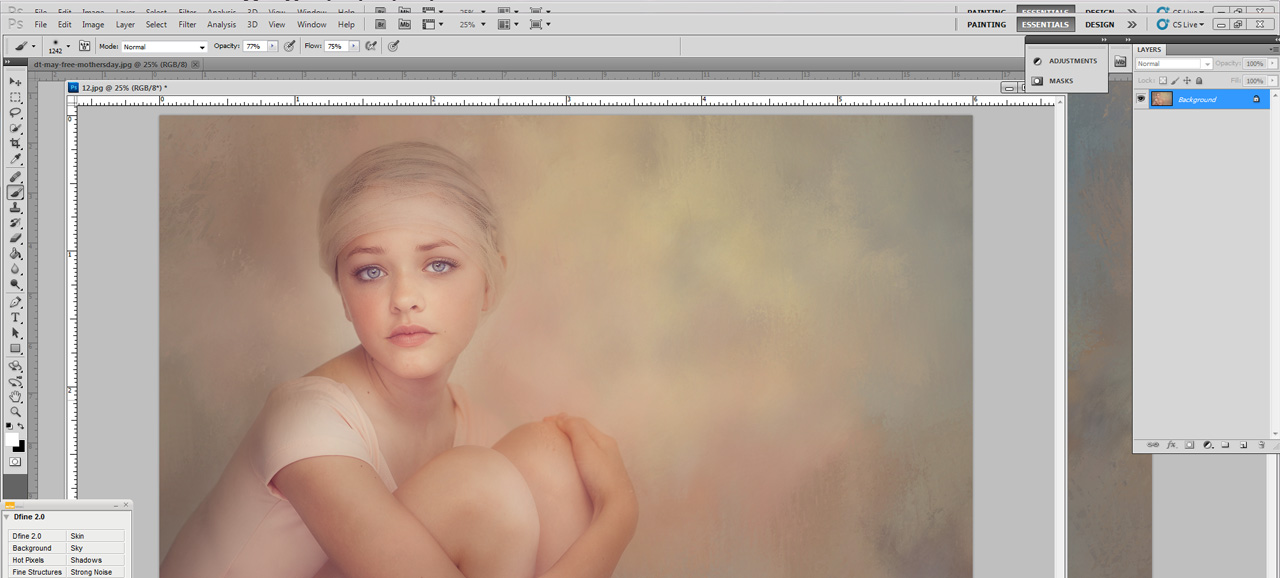
I generally choose an opacity and flow in the 20 range…just so the subjects blends into the texture. Don’t worry about getting every last piece of texture off the subject, it actually looks a bit better and makes it look a little less “cut out”…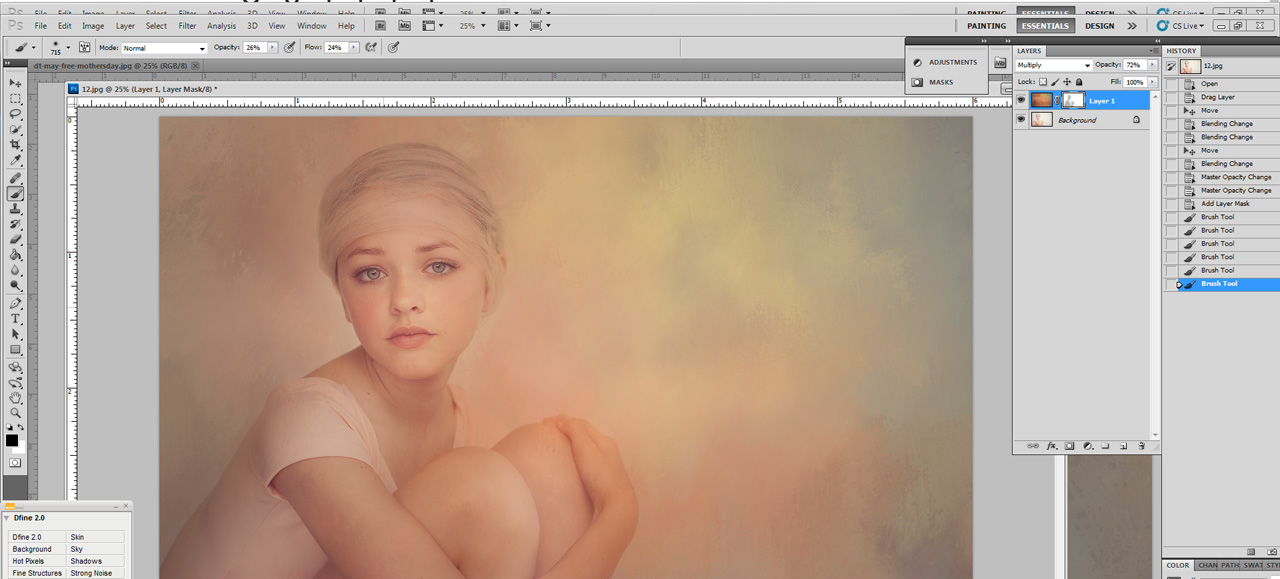
The eyes, I will erase a little more. I have the opacity and flow around 70. If you use 100%, it might look like she has cut out eyes…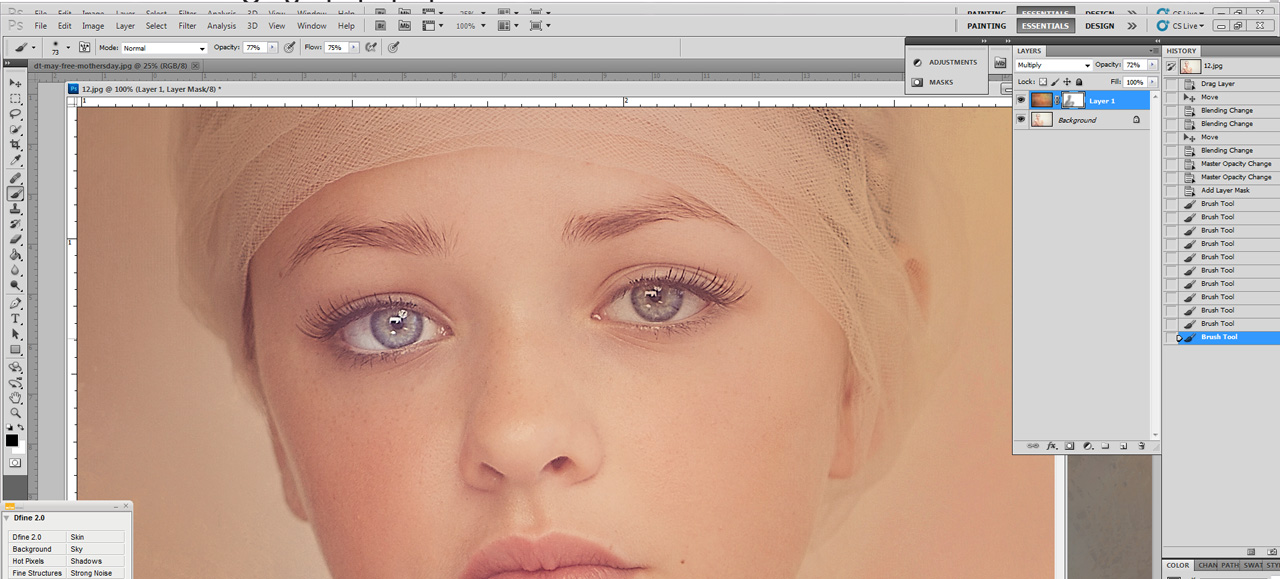
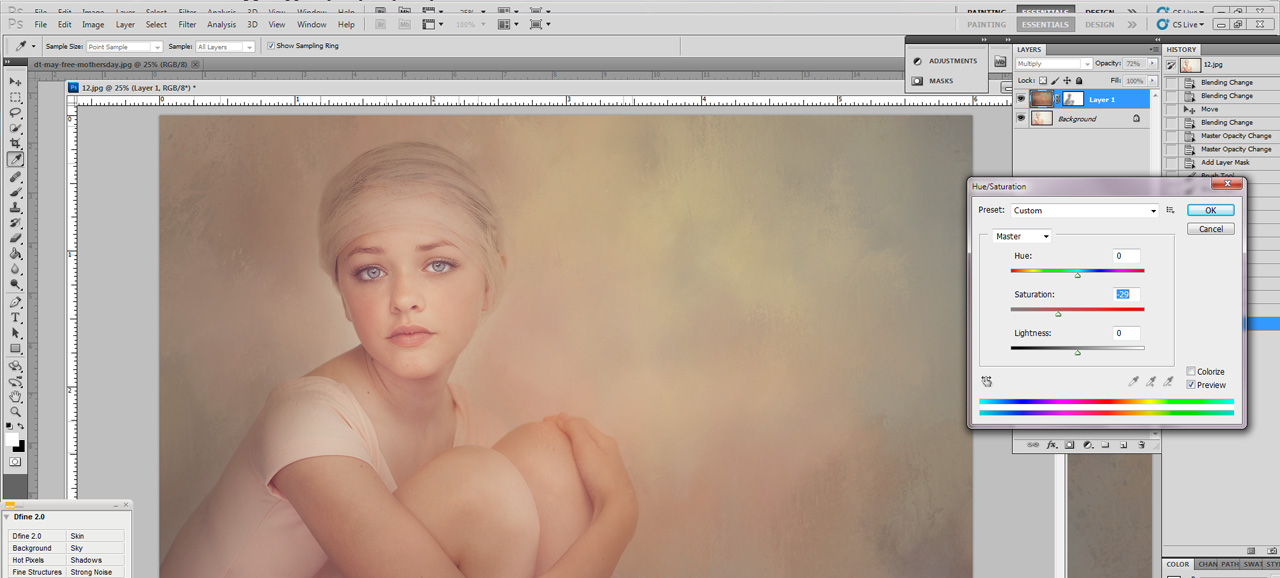
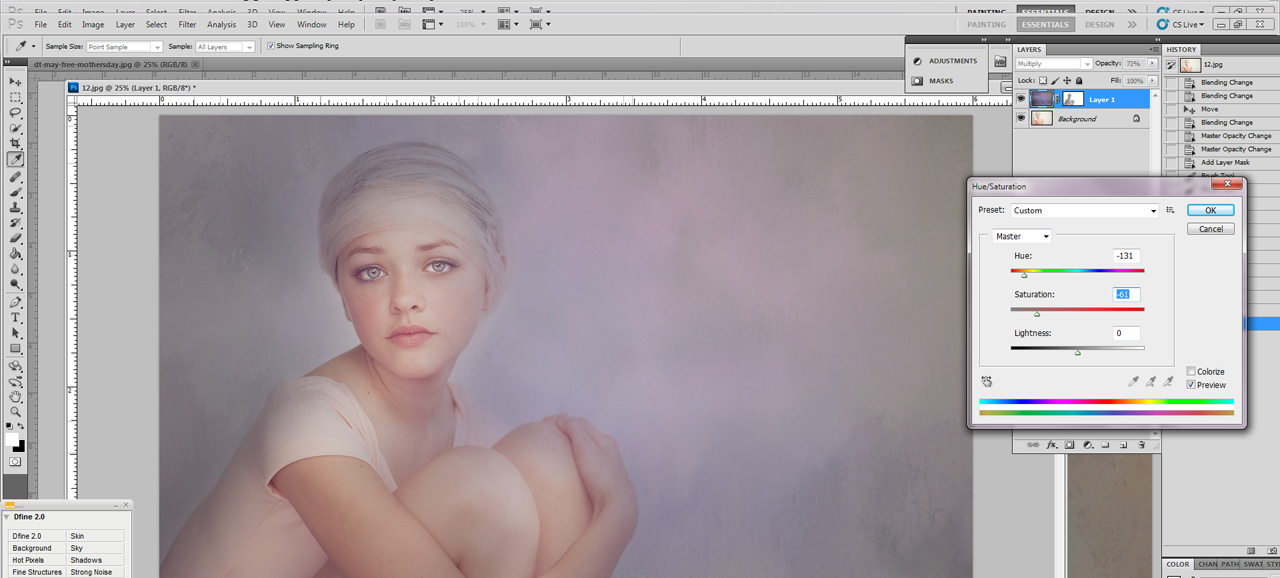
You can play around this the textures saturation and hue to get it to where you would like. Make sure you click off the mask and click on to the texture to do this…
Then do some dodging and burning and experiment with what you like best. 🙂
Great article! I’ve always wondered how these kinds of photos are made. Thanks for the insight!
You’re welcome. While not all portraits lend themselves to this, textures definitely bring another level of creativity to those portraits that do.